Create Glassmorphism Sidebar
with HTML CSS
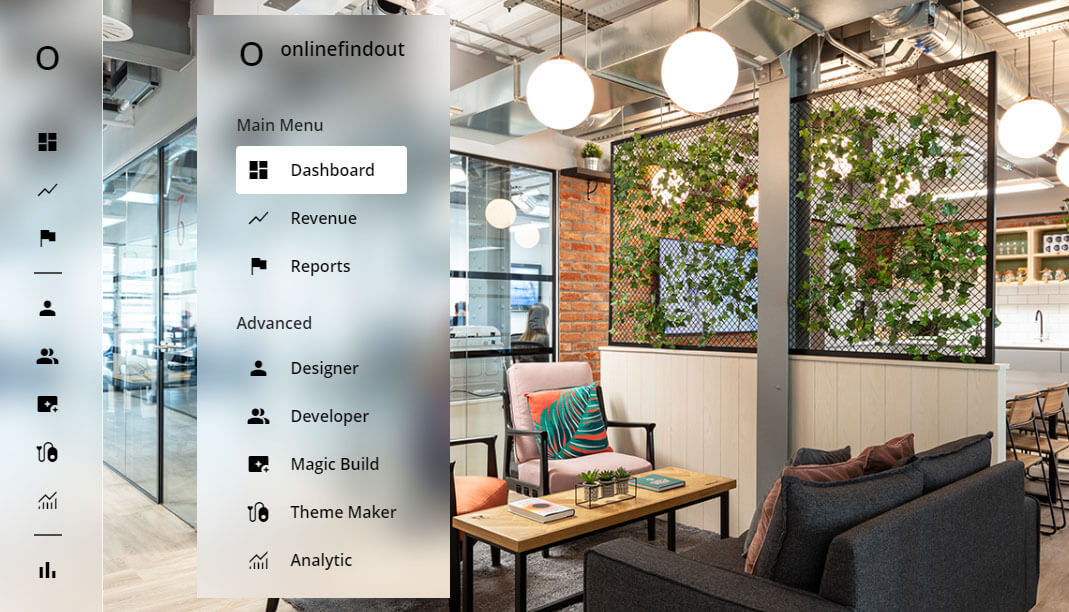
Tody we'll show you the best way to make a sleek Glassmorphism Sidebar utilizing just HTML and CSS. Not exclusively will we apply the rich glassmorphism impact to the sidebar, however we'll likewise add an intelligent float activity.
At first, the sidebar remained fell, showing just the symbols of each connection. In any case, when we drift over the sidebar, it easily extends and uncovers the separate logo's connection. This liveliness is finished with unadulterated CSS and HTML.
Video Tutorial of Glassmorphism Sidebar
Glassmorphism Sidebar [Source Codes]
To Create Glassmorphism Sidebar with HTML and CSS follow the given steps line by line:
Create a folder. You can name this folder whatever you want, and inside this folder, create the mentioned files.
Create an index.html file. The file name must be index and its extension .html
Create a style.css file. The file name must be style and its extension .css
Once you create these files, paste the given codes into the specified files. If you don’t want to do these then scroll down and download the source code by clicking download button.
First, paste the following codes into your index.html file
- <!DOCTYPE html>
- <html lang="en">
- <head>
- <meta charset="UTF-8">
- <title>Glassmorphism Sidebar</title>
- <link rel="stylesheet" href="https://fonts.googleapis.com/css2?family=Material+Symbols+Outlined:opsz,wght,FILL,GRAD@20..48,100..700,0..1,-50..200">
- <link rel="stylesheet" href="style.css">
- </head>
- <body>
- <aside class="sidebar">
- <div class="logo">
- <span class="main-logo">o</span>
- <h2>onlinefindout</h2>
- </div>
- <ul class="links">
- <h4>Main Menu</h4>
- <li>
- <span class="material-symbols-outlined">dashboard</span>
- <a href="#">Dashboard</a>
- </li>
- <li>
- <span class="material-symbols-outlined">show_chart</span>
- <a href="#">Revenue</a>
- </li>
- <li>
- <span class="material-symbols-outlined">flag</span>
- <a href="#">Reports</a>
- </li>
- <hr>
- <h4>Advanced</h4>
- <li>
- <span class="material-symbols-outlined">person</span>
- <a href="#">Designer</a>
- </li>
- <li>
- <span class="material-symbols-outlined">group</span>
- <a href="#">Developer </a>
- </li>
- <li>
- <span class="material-symbols-outlined">ambient_screen</span>
- <a href="#">Magic Build</a>
- </li>
- <li>
- <span class="material-symbols-outlined">pacemaker</span>
- <a href="#">Theme Maker</a>
- </li>
- <li>
- <span class="material-symbols-outlined">monitoring</span>
- <a href="#">Analytic</a>
- </li>
- <hr>
- <h4>Account</h4>
- <li>
- <span class="material-symbols-outlined">bar_chart</span>
- <a href="#">Overview</a>
- </li>
- <li>
- <span class="material-symbols-outlined">mail</span>
- <a href="#">Message</a>
- </li>
- <li>
- <span class="material-symbols-outlined">settings</span>
- <a href="#">Settings</a>
- </li>
- <li class="logout-link">
- <span class="material-symbols-outlined">logout</span>
- <a href="#">Logout</a>
- </li>
- </ul>
- </aside>
- </body>
- </html>
-
Now paste the following codes into your style.css file
- * {
- margin: 0;
- padding: 0;
- box-sizing: border-box;
- font-family: "Open Sans", sans-serif;
- }
-
- body {
- height: 100vh;
- width: 100%;
- background-image: url("bg.jpg");
- background-position: center;
- background-size: cover;
- }
-
- .sidebar {
- position: fixed;
- top: 0;
- left: 0;
- width: 110px;
- height: 100%;
- display: flex;
- align-items: center;
- flex-direction: column;
- background: rgba(255, 255, 255, 0.2);
- backdrop-filter: blur(17px);
- --webkit-backdrop-filter: blur(17px);
- border-right: 1px solid rgba(255, 255, 255, 0.7);
- transition: width 0.3s ease;
- }
-
- .sidebar:hover {
- width: 260px;
- }
-
- .sidebar .logo {
- color: #000;
- display: flex;
- align-items: center;
- padding: 25px 10px 15px;
- }
-
- .main-logo{
- font-size: 45px;
- }
-
- .logo h2 {
- font-size: 1.19rem;
- font-weight: 600;
- margin-left: 15px;
- display: none;
- }
-
- .sidebar:hover .logo h2 {
- display: block;
- }
-
- .sidebar .links {
- list-style: none;
- margin-top: 20px;
- overflow-y: auto;
- scrollbar-width: none;
- height: calc(100% - 140px);
- }
-
- .sidebar .links::-webkit-scrollbar {
- display: none;
- }
-
- .links li {
- display: flex;
- border-radius: 4px;
- align-items: center;
- }
-
- .links li:hover {
- cursor: pointer;
- background: #fff;
- }
-
- .links h4 {
- color: #222;
- font-weight: 500;
- display: none;
- margin-bottom: 10px;
- }
-
- .sidebar:hover .links h4 {
- display: block;
- }
-
- .links hr {
- margin: 10px 8px;
- border: 1px solid #4c4c4c;
- }
-
- .sidebar:hover .links hr {
- border-color: transparent;
- }
-
- .links li span {
- padding: 12px 10px;
- }
-
- .links li a {
- padding: 10px;
- color: #000;
- display: none;
- font-weight: 500;
- white-space: nowrap;
- text-decoration: none;
- }
-
- .sidebar:hover .links li a {
- display: block;
- }
-
- .links .logout-link {
- margin-top: 20px;
- }
If you face any difficulties while creating Glassmorphism Sidebar or your code is not working as expected, you can download the source code files by clicking download button.
Related post
 Build a Digital Clock using HTML CSS and JavaScript
onlinefindout
 Analog Clock using HTML CSS and JavaScript
onlinefindout
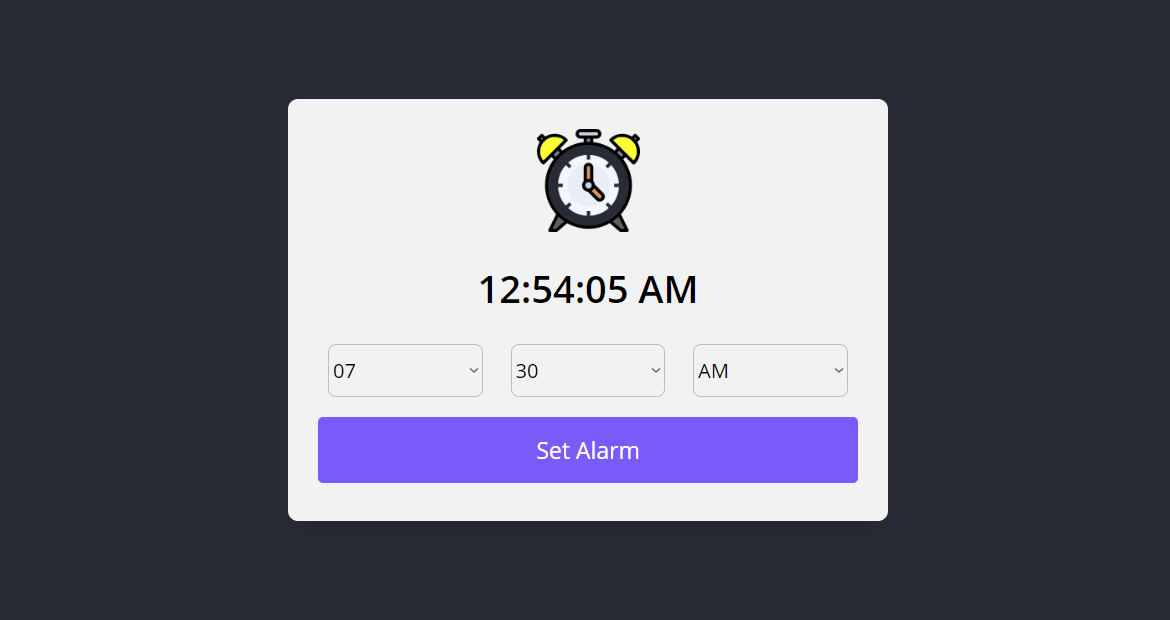 Create Alarm Clock with HTML CSS and JavaScript